


Makes 1 big loaf
Ingredients:
1. 2 1/2 cup (625 ml) hot water
2. 25 g fresh yeast
3. 1 TBS olive oil
4. 1 1/2 tsp salt
5. 4 1/4 cups wheat flour
6. 1 1/2 cup white whole wheat flour
7. 2 TBS flax seeds
8. 2 TBS sesame seeds
9. 2 TBS sunflower seeds
10. 2 TBS pumpkin seeds
11. 2 TBS uncooked millet
12. 1 cup cooked wheat berries
13. 1 cup cooked oat groats
14. 1 cup cooked barley
15. 1/4 cup rolled oats (for sprinkling on top of the bread)
Directions:
1. Cook oat groats according to instructions here. Same method for cooking barley.
2. Soak millet in boiling water for 20 mins.
3. In a large mixing bowl, add water and yeast and mix well.
4. Add salt, flax seeds, sesame seeds and mix well.
5. Gradually add in the wheat flour and mix well.
6. Then mix in the white whole wheat flour and mix well. Let the dough rest for 15 minutes.
9. Knead by hand or run the mixer for 10 minutes. Add in sunflower seeds, pumpkin seeds and oat groats and barley, knead and mix well.
10. Let dough rest in a warm place and rise until double its size, about 1 hour.
11. Punch down dough and knead again briefly.
12. Oil with olive oil a 9 x 5 loaf pan and sprinkle its bottom with seeds. Place the dough into the loaf pan until it is 1 inch below the surface of the loaf pan, to allow space for expansion of the dough during baking.
13. Cover the loaf and let it rise to double its size, about 20 minutes.
14. Pre-heat oven to 175 degree celsius.
15. When the loaf has risen to double its size, spray a bit of water on the top of the loaf to avoid cracking and sprinkle some rolled oats on the top.
16. Insert a thermometer into the middle of the dough and place it in the middle rack of the oven with another tray containing water just below it to generate steam.
17. Bake for 20 minutes and rotate the dough. Bake for another 20 minutes or until the thermometer inserted into the dough reaches 85-87 degree Celsius.
18. Let cool for 1-2 hour before slicing the bread. If the bread is sliced before it is cooled down, it will be lumpy inside.
Storage:
Sliced bread keeps in fridge for up to 5 days. Can also be frozen. When you want a slice, take it out from the freezer and put it directly into the toaster.
Additional Information:
I like the store-bought multigrain toast bread a lot, but the store-bought one contains lots of preservatives and chemical to make it last long as well as stay soft. Thus, I have been wanting to learn to bake my own multigrain bread.

Baking bread takes time, and I can only bake it if I have the whole morning or afternoon free, usually on a weekend. The first time I tried, my dough was over-proof as I got busy with other stuff. It tasted too yeasty as a result. It is very important to let the dough rise to double its size, but no more and no less.
This time round, I was careful with it. The bread turned out well, and both kids love it. It tasted similar to the store-bought ones, but better. i like the texture of the oat groats and pumpkin seeds in the bread. Next time, I would add even more oat groats and pumpkin seeds.
Multigrain bread is usually baked with wheat flour. The store-bought one contains 17% whole wheat flour. For this version, I tried with 26% of the flour using white whole wheat flour and it turned out great - soft like the wheat flour bread and chewy, and yet containing more fiber and nutrients. I think it's because white whole wheat flour is closer to wheat flour, while still completely whole wheat.
The store-bought bread contains malt. It makes a big difference to the taste and flavor by adding a malt ingredient. In this case, I have used malt syrup.
I added another cup of white whole wheat flour and 3/4 cup of wheat flour because it was too sticky.
I also use my rice cooker to cook the wheat berries and mixed grains. Will do a post to show later.
References:
https://www.inverse.com/article/54095-which-bread-is-healthiest-for-you-multigrain-whole-wheat-whole-grain
https://www.hsph.harvard.edu/nutritionsource/hearty-whole-grain-bread/
https://vanillaandbean.com/multigrain-bread/
https://www.seasonsandsuppers.ca/seeded-multigrain-sandwich-bread/
https://www.ihearteating.com/multigrain-bread-recipe/
https://minimalistbaker.com/the-easiest-whole-grain-seeded-bread/
https://www.tarladalal.com/Multigrain-Bread-Homemade-Multigrain-Bread-40829r
https://www.healthline.com/nutrition/ezekiel-bread
https://www.completelydelicious.com/multigrain-bread/
https://shop.mybluprint.com/baking/article/how-to-make-whole-grain-bread/
https://shop.mybluprint.com/baking/article/knead-to-know-basis-4-key-tips-for-making-whole-grain-bread/
https://www.allrecipes.com/video/821/simple-whole-wheat-bread/?internalSource=picture_play&referringId=6773&referringContentType=Recipe
https://www.allrecipes.com/video/3184/whole-wheat-banana-nut-bread/?internalSource=related_carousel&referringId=4698&referringContentType=Video
https://youtu.be/0dtBjqIu5W8
http://www.anjao.com/koldh%C3%A6vede-boller-med-kerner/
https://altomkost.dk/opskrifter/opskrift/opskrift/kerneboller/
https://www.vores-opskrifter.dk/5-korns-boller/
https://www.dk-kogebogen.dk/opskrifter/20048/5-korns-boller
https://www.louisesmadblog.dk/kerneboller/
http://mettes-madhistorier.dk/?p=237
https://www.alt.dk/mad/opskrift/kornsboller
http://www.madtanterne.dk/grovboller/
https://www.valdemarsro.dk/koldhaevede-boller/
https://www.valsemollen.dk/opskrifter/5-korns-rugbroed/
http://www.nordiskspisehus.dk/kokkenes-opskrifter/5-kornsbroed-fra-nordisk-spisehus/
https://www.madital.dk/debat/mad/traad.php?id=55032
https://www.madopskrifter.nu/Opskrifter/Langtidsh%c3%a6vede+grovboller.opskrift?0=10594
http://colorfulfunliving.blogspot.com/2014/09/yndlings-franskbrd-med-5-kornsblanding.html


 It tastes delicious with melted cheese :-)
5. Gradually add in the wheat flour and mix well.
6. Then mix in the white whole wheat flour and mix well. Let the dough rest for 15 minutes.
9. Knead by hand or run the mixer for 10 minutes. Add in sunflower seeds, pumpkin seeds and oat groats and barley, knead and mix well.
10. Let dough rest in a warm place and rise until double its size, about 1 hour.
11. Punch down dough and knead again briefly.
12. Oil with olive oil a 9 x 5 loaf pan and sprinkle its bottom with seeds. Place the dough into the loaf pan until it is 1 inch below the surface of the loaf pan, to allow space for expansion of the dough during baking.
13. Cover the loaf and let it rise to double its size, about 20 minutes.
14. Pre-heat oven to 175 degree celsius.
15. When the loaf has risen to double its size, spray a bit of water on the top of the loaf to avoid cracking and sprinkle some rolled oats on the top.
16. Insert a thermometer into the middle of the dough and place it in the middle rack of the oven with another tray containing water just below it to generate steam.
17. Bake for 20 minutes and rotate the dough. Bake for another 20 minutes or until the thermometer inserted into the dough reaches 85-87 degree Celsius.
18. Let cool for 1-2 hour before slicing the bread. If the bread is sliced before it is cooled down, it will be lumpy inside.
Storage:
Sliced bread keeps in fridge for up to 5 days. Can also be frozen. When you want a slice, take it out from the freezer and put it directly into the toaster.
Additional Information:
I like the store-bought multigrain toast bread a lot, but the store-bought one contains lots of preservatives and chemical to make it last long as well as stay soft. Thus, I have been wanting to learn to bake my own multigrain bread.

Baking bread takes time, and I can only bake it if I have the whole morning or afternoon free, usually on a weekend. The first time I tried, my dough was over-proof as I got busy with other stuff. It tasted too yeasty as a result. It is very important to let the dough rise to double its size, but no more and no less.
This time round, I was careful with it. The bread turned out well, and both kids love it. It tasted similar to the store-bought ones, but better. i like the texture of the oat groats and pumpkin seeds in the bread. Next time, I would add even more oat groats and pumpkin seeds.
Multigrain bread is usually baked with wheat flour. The store-bought one contains 17% whole wheat flour. For this version, I tried with 26% of the flour using white whole wheat flour and it turned out great - soft like the wheat flour bread and chewy, and yet containing more fiber and nutrients. I think it's because white whole wheat flour is closer to wheat flour, while still completely whole wheat.
The store-bought bread contains malt. It makes a big difference to the taste and flavor by adding a malt ingredient. In this case, I have used malt syrup.
I also use my rice cooker to cook the wheat berries and mixed grains. Will do a post to show later.
References:
https://www.inverse.com/article/54095-which-bread-is-healthiest-for-you-multigrain-whole-wheat-whole-grain
https://www.hsph.harvard.edu/nutritionsource/hearty-whole-grain-bread/
https://vanillaandbean.com/multigrain-bread/
https://www.seasonsandsuppers.ca/seeded-multigrain-sandwich-bread/
https://www.ihearteating.com/multigrain-bread-recipe/
https://minimalistbaker.com/the-easiest-whole-grain-seeded-bread/
https://www.tarladalal.com/Multigrain-Bread-Homemade-Multigrain-Bread-40829r
https://www.healthline.com/nutrition/ezekiel-bread
https://www.completelydelicious.com/multigrain-bread/
https://shop.mybluprint.com/baking/article/how-to-make-whole-grain-bread/
https://shop.mybluprint.com/baking/article/knead-to-know-basis-4-key-tips-for-making-whole-grain-bread/
https://www.allrecipes.com/video/821/simple-whole-wheat-bread/?internalSource=picture_play&referringId=6773&referringContentType=Recipe
https://www.allrecipes.com/video/3184/whole-wheat-banana-nut-bread/?internalSource=related_carousel&referringId=4698&referringContentType=Video
https://youtu.be/0dtBjqIu5W8
http://www.anjao.com/koldh%C3%A6vede-boller-med-kerner/
https://altomkost.dk/opskrifter/opskrift/opskrift/kerneboller/
https://www.vores-opskrifter.dk/5-korns-boller/
https://www.dk-kogebogen.dk/opskrifter/20048/5-korns-boller
https://www.louisesmadblog.dk/kerneboller/
http://mettes-madhistorier.dk/?p=237
https://www.alt.dk/mad/opskrift/kornsboller
http://www.madtanterne.dk/grovboller/
https://www.valdemarsro.dk/koldhaevede-boller/
https://www.valsemollen.dk/opskrifter/5-korns-rugbroed/
http://www.nordiskspisehus.dk/kokkenes-opskrifter/5-kornsbroed-fra-nordisk-spisehus/
https://www.madital.dk/debat/mad/traad.php?id=55032
https://www.madopskrifter.nu/Opskrifter/Langtidsh%c3%a6vede+grovboller.opskrift?0=10594
http://colorfulfunliving.blogspot.com/2014/09/yndlings-franskbrd-med-5-kornsblanding.html

White whole wheat flour from Føtex Supermarket.

In a mixing bowl, add 1 cup (625 ml) of hot water.

Add 2 tablespoon of flax seeds.

Add 2 tablespoons of sesame seeds.

Add 25 g of fresh yeast.

Add 1 cup of the wheat flour first. Stir and mix well.

Add 3 teaspoons of salt.

Stir and mix well.

Add the remaining 3 1/4 cup of wheat flour.

Add 1 1/2 cup of white whole wheat flour.

Knead and mix well.

Cover and let it rest for 15 minutes.

Add 2 cups of cooked oat groats.

Add 1 cup of cooked barley.

Add 2 tablespoons of soaked millet.

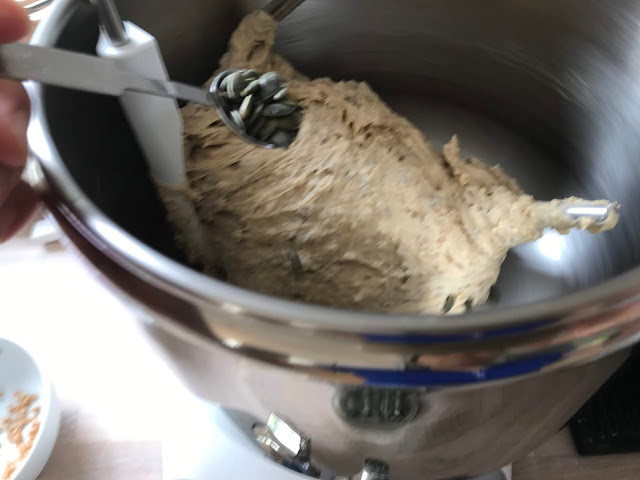
Add 2 tablespoons of pumpkin seeds.

Add 2 tablespoons of sunflower seeds.
If it is sticky, adjust with more flour.

Knead and mix well.
Cover and let it rise to double its size, about 1.5 hour.

Now it is risen to double its size. The goal is not 1.5 hour, but the goal is to double its size.

Spray a bit of olive oil to coat the loaf pan.

Sprinkle its bottom with seeds.

Place dough in until it is 1 inch below the surface of the loaf pan, to allow space for expansion of the dough during baking.

Cover with a clean kitchen towel and let it rise until double its size, about 45 minutes to an hour. In the mean time, pre-heat the oven to 175 degree celsius with a tray of water in it.

Now it has risen to double its size in the loaf pan :-)

Spray a bit of water on the top of the loaf to avoid cracking.

Sprinkle some rolled oats on the top of the loaf.

Insert the baking thermometer into the dough.

Place it in the middle rack of the oven with another tray containing water just below it to generate steam.

Bake for 20 minutes and rotate the dough. Bake for another 20 minutes or until the thermometer inserted into the dough reaches 85 degree celsius.

Let cool for an hour before slicing the bread.
Now it's done :-)

Cut and enjoy :-)


